Photoshop
- Sophie Litchfield

- Sep 27, 2018
- 3 min read
As well as learning how to use Illustrator, I learnt Photoshop as well.
Fix the Exposure
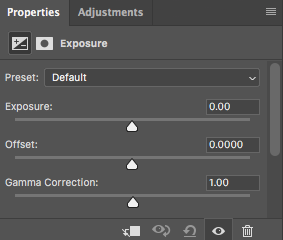
The Exposure tool adjusts all tonal values equally and is best for when the photo is under or overexposed.
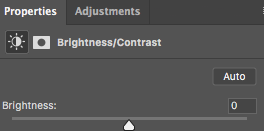
The Brightness option focuses more on the mid-tones and can brighten the image without affecting the highlights or shadows. This is best for most photos, where they're correctly exposed but need a little tweak to make then brighter or darker.
Boost the Colours

Saturation changes the colours equally, setting it to -100 makes a black and white image.
Vibrance is more subtle and focuses on the less-saturated colours avoiding affecting the colours that are already bright enough.
Contrast & White Balance With Levels

The Levels are built around the histogram. The chart shows the tonal range of the photo, from back on the left to white on the right.
Moving the tabs on both sides inwards until they are in line with the first load of data in the histogram adds contrast.
There are three eyedroppers located on the right under 'options'. The middle one is used to select grey points in the photo, correcting the white balance.
If there is nothing in the image that is grey, pick a neutral colour instead.
Removing Unwanted Objects

The Spot Healing Brush tool helps remove unwanted objects in the frame.
It can also help remove dust or other spots within the image.
Remove Larger Objects

To remove larger objects, select it by either using the Marquee tool and drawing a square around it or with the Lasso tool and drawing around freehand.
Depending on how complex the background is, sometimes it will be more of an advanced skill on detail images.
Moving Objects

The quick tool is best used on smaller elements placed against plain backgrounds or backgrounds with on-uniform textures (like foliage). Working with anything on a larger scale will need more of an advanced skill.
The Spot Healing Brush tool will need to be used afterwards to blend the object and image together.
Enhance Detail

The Dodge and Burn tools are brushes used to paint over selected areas of the image. The more the area is painted over, the light or darker it gets.
Adding Drama to the Skies
By adding a graduated neutral density filter to your camera fixes high-contrast skies being over exposed or on cloudy days the sky being grey and dull, however not everyone has these but you can still do the effect in Photoshop.
Using the Levels tool, use the centre tab and drag right until the sky is better exposed.
Masks
Masks enable you to blend two or more layers together.
A mask controls the opacity of the layer upon which it is placed. This is done by painting white and black areas onto the mask: white areas are fully opaque, black areas are fully transparent. Where there is black, you can see the content of the layer directly below.
When you use a gradient from white to black, you get a smooth transition between the top layer and what's visible underneath.
Adding a Layer Mask
After the layer is duplicated and edited, the 'add layer mask' button at the bottom of layers panel with add a mask.
From the toolbar select the Gradient tool and choose the white to black gradient.
Click a third of the way from the top and drag down in a straight line to the horizon.
The two layers will blend together.
Black & White

As soon as Black & White is selected, the colour will be removed from the image.
The panel has a range of sliders which relates to a colour.
When the green slider is moved to the right, all parts of the image that originally contained green will become lighter.
The blue slider dragged to the left and all the blue areas, such as the sky, will become darker.
For more of an effect, the Tint button will add a coloured tint to the image.


Comments